


Updated on: March 9, 2026
Kawasaki ZX-6R fairings transform your sport bike's appearance while protecting critical engine components from damage. This guide explores the benefits and drawbacks of upgrading your fairing system, provides practical installation steps, and answers common questions riders have about these essential motorcycle accessories. Whether you're seeking better aerodynamics or simply want a fresh look, understanding your options helps you make an informed decision.
Table of Contents
- Advantages and Disadvantages
- Installation Instructions
- Material Selection
- Care and Upkeep
- Frequently Asked Questions
- Summary
Understanding Kawasaki ZX-6R Fairings
Kawasaki ZX-6R fairings are protective body panels designed specifically for this popular middleweight sport motorcycle. These components serve multiple purposes beyond aesthetics. They reduce wind resistance at highway speeds, protect your engine and frame during accidents, and contribute to the bike's overall structural integrity. Riders often upgrade their fairings to improve performance, enhance visual appeal, or replace damaged panels after crashes. The right fairing choice can significantly impact both your riding experience and your motorcycle's resale value.
When considering new fairings for your ZX-6R, you'll encounter various styles, materials, and price points. Understanding the differences helps you select components that match your riding style and budget. Professional-grade fairings offer superior durability and fitment, while aftermarket options provide more customization possibilities. Many riders view fairing upgrades as essential investments that enhance both function and form.

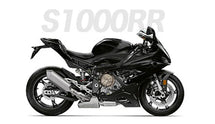
Sport bike body panels with aerodynamic curves and aggressive styling lines
Advantages and Disadvantages of Upgrading Your Fairing System
Positive Aspects
- Enhanced Aerodynamics: Quality fairings reduce wind drag, allowing you to ride more comfortably at higher speeds and potentially improve fuel efficiency.
- Superior Protection: Durable fairing panels shield your engine, radiator, and frame from road debris, insects, and minor impacts during normal riding.
- Customization Opportunities: Available in numerous colors, designs, and finishes, fairings let you personalize your motorcycle's appearance to match your style.
- Improved Resale Value: A well-maintained bike with quality aftermarket fairings often commands higher prices in the used motorcycle market.
- Weather Protection: Fairings help deflect water, mud, and road spray away from your body and engine components, reducing maintenance needs.
- Professional Appearance: Upgraded panels give your bike a more polished, race-inspired look that turns heads at local meetups and track days.
Potential Drawbacks
- Installation Complexity: Proper fairing installation requires patience, mechanical knowledge, and specialized tools that not all riders possess.
- Initial Cost Investment: Quality fairing kits represent a significant expense, particularly when paired with professional installation services.
- Maintenance Requirements: Plastic panels need regular cleaning and occasional touch-ups to maintain their appearance and protective qualities.
- Fitment Concerns: Some aftermarket fairings may not fit perfectly without modifications, requiring additional adjustments or adjustments to mounting points.
- Weight Addition: New fairing systems add minimal but measurable weight to your motorcycle, which can slightly affect acceleration and handling.
- Replacement Costs: Damaged fairings during crashes or accidents can be expensive to replace compared to other motorcycle components.
Step-by-Step Installation Instructions
Gathering Necessary Tools and Materials
Before beginning your fairing installation, collect all required tools and materials. You'll need a socket set, screwdrivers (both Phillips and flathead), a torque wrench for precise fastener tightening, trim panels removal tools, and masking tape. Have your new fairings, mounting brackets, fasteners, and installation instructions ready. Clear a clean workspace with adequate lighting to prevent losing small parts. Consider laying out a protective blanket or mat to catch dropped components and prevent scratching your painted surfaces.
Removing Original Fairing Panels
Start by disconnecting your motorcycle's battery to prevent electrical issues during removal. Take photographs of the existing setup before disassembly so you can reference proper orientation later. Carefully remove any trim pieces, then locate and remove fasteners holding the fairings. Work methodically from top to bottom, supporting the panels as you remove fasteners to prevent dropping them. Set aside all fasteners in labeled containers so you know which pieces go where during reassembly. Take your time during removal—forcing stuck panels can crack plastic and create alignment problems later.

Organized motorcycle maintenance workspace with labeled fasteners and protective coverings
Preparing and Positioning New Fairings
Examine your new panels for any shipping damage or manufacturing defects before installation. Check that all pre-drilled holes align properly with mounting points on your motorcycle frame. Apply masking tape around areas where panels meet to protect your paint during handling. Carefully position the first fairing section, ensuring it sits flush against the frame and aligns with adjacent panels. Insert fasteners loosely at first, allowing slight adjustment for perfect alignment before final tightening.
Securing Fasteners and Final Adjustments
Once all panels are positioned correctly, tighten fasteners gradually in a cross pattern to ensure even pressure distribution. This technique prevents warping or misalignment that can occur when fasteners are tightened sequentially. Use your torque wrench to achieve manufacturer-specified tightness levels. Check gaps between panels and ensure they align properly with the frame. Make any necessary micro-adjustments before final tightening. Reconnect your battery and perform a visual inspection of the entire installation.
Material Selection and Quality Considerations
Kawasaki ZX-6R fairings come in several material options, each offering distinct advantages. Genuine OEM (original equipment manufacturer) fairings provide perfect fitment and durability but carry premium pricing. ABS plastic fairings offer excellent impact resistance and durability at moderate prices. Fiberglass alternatives deliver superior customization possibilities and lightweight construction, though they require more careful handling. Carbon fiber panels represent the ultimate performance choice, providing maximum strength-to-weight ratio but commanding the highest prices. Consider your budget, riding style, and long-term ownership plans when selecting materials. A quality fairing supplier can guide you toward the best option for your specific needs.
Care and Maintenance for Long-Term Durability
Proper maintenance keeps your fairings looking pristine and functioning optimally. Wash your panels regularly with mild soap and water to remove road grime and bug residue. Avoid harsh chemicals and high-pressure washers that can damage plastic surfaces. Apply protective wax or UV-resistant coating every few months to prevent fading and oxidation. Inspect fasteners periodically and tighten any that have loosened from vibration. Address minor cracks or scratches promptly to prevent water intrusion and further damage. Store your motorcycle indoors when possible to minimize sun exposure and environmental stress. Consider a quality protective cover for extended storage periods.
Frequently Asked Questions
How long does fairing installation typically take for an experienced mechanic?
Professional installation usually requires two to four hours, depending on your motorcycle's condition and the complexity of your chosen fairing system. If you're performing installation yourself for the first time, expect to spend six to eight hours. Subsequent installations become faster as you develop familiarity with the process. Always prioritize quality work over speed—rushing installation can result in misaligned panels and poor fitment.
Can I install Kawasaki ZX-6R fairings without special tools or technical expertise?
Basic installation is achievable for mechanically inclined riders with standard tools and patience. However, achieving perfect alignment and fitment may require specialized knowledge. If you're uncomfortable working on your motorcycle, professional installation ensures proper fitment and prevents costly mistakes. Many motorcycle shops offer installation services at reasonable rates.
What should I do if my new fairings don't fit perfectly after installation?
Minor fitment issues often resolve with careful adjustment of mounting brackets and fastener positions. Take photographs and compare panel alignment from multiple angles. Visit a motorcycle mechanic or the fairing supplier for guidance if problems persist. Some fairings may require minor drilling or bracket modifications for perfect fitment on specific model years.
How do I protect my fairings from UV damage and oxidation?
Apply UV-protective coating or wax specifically designed for plastic surfaces every three months. Store your motorcycle indoors or under a protective cover when not in use. Park in shaded areas whenever possible to minimize sun exposure. Regular cleaning removes contaminants that can accelerate degradation.
Are there performance benefits beyond aerodynamics when upgrading to better fairings?
While aerodynamic improvements are primary, quality fairings also reduce vibration transmission and protect critical engine components from damage. This protection can extend your engine's lifespan and reduce maintenance costs. Weight reduction from carbon fiber options can modestly improve acceleration and handling characteristics.
Summary and Final Recommendations
Upgrading your Kawasaki ZX-6R fairings offers both functional and aesthetic benefits that enhance your overall riding experience. Weigh the advantages of improved aerodynamics, enhanced protection, and customization possibilities against the costs and maintenance requirements. Choose materials that match your budget and performance expectations. Whether you opt for professional installation or tackle the project yourself, prioritize proper fitment and secure fastening. Quality fairings represent an investment in your motorcycle's longevity, appearance, and resale value. Browse reputable suppliers like specialized fairing retailers to find options that match your specifications. Take time to understand your motorcycle's needs and your personal preferences before making a purchase decision. With proper selection, installation, and maintenance, your new fairings will provide years of reliable service and satisfaction. For additional information about motorcycle protection and maintenance, visit VIN SHIELD UK LTD to explore comprehensive protection options for your valuable motorcycle investment.